An hour of work. A walkthrough or an AI-guided path.
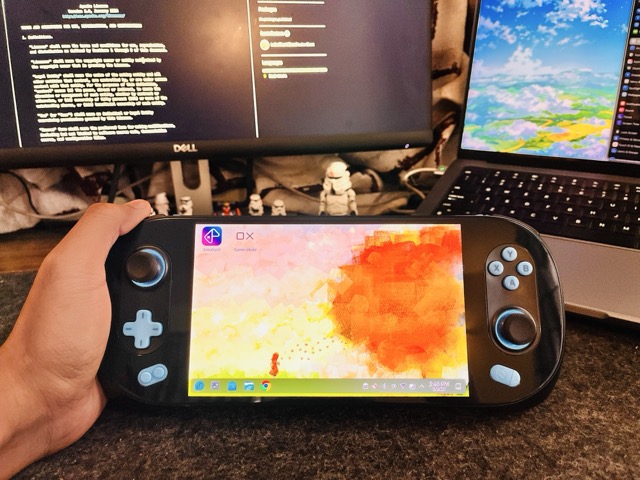
The SuiPlay0x1 was shipped as a gaming handheld, with a controller-first launcher called Playtron GameOS designed for couch play. But if you are here then you already know that's not all we want!
Underneath that launcher is a full Linux computer. With about an hour of patient setup, you can turn the same device into a proper desktop: a keyboard-and-mouse interface, a web browser, file manager, Steam, Chrome, RetroArch, Discord, anything you'd run on a regular PC. A single tap toggles you back into the original gaming launcher whenever you want.
I did the unlock on mine over a Sunday afternoon. Below is the path that worked, the two places the official tutorial gets it wrong, and a friendlier route if typing commands isn't your thing.
Don't want to type commands yourself? Skip to "The easy path" at the bottom. You install one thing, then ask your AI assistant to walk you through. It tells you what to do, you do it, you're done.
What you'll have at the end
After roughly an hour, mostly waiting on a download, your SuiPlay0x1 will:
Boot into a full KDE Plasma desktop (the same desktop environment Steam Deck uses)
Run any app from Flathub (the standard Linux app store): Chrome, Firefox, Steam, Discord, RetroArch, Heroic for Epic and GOG games, RetroDeck for emulators, anything else
Still have the original Playtron Game Mode one tap away, with a Desktop Mode tile added so you can switch back and forth instantly
Nothing about the hardware changes. Nothing physical gets opened. There's no firmware flash. If anything goes wrong at any step, holding the power button for ten seconds boots the device back to its previous working state.
Is this for you?
Yes, if any of these sound right:
You bought the SuiPlay0x1 partly hoping to do more with it than just play games
You want apps the GameOS launcher doesn't have (a regular browser, a Linux app, an emulator)
You're curious what's underneath
You've had it a few weeks and the launcher feels limiting
What it costs: about an hour, a laptop on the same Wi-Fi as your handheld, and a charged device.
What you need before starting
The SuiPlay0x1, charged or plugged in. The build can take 30+ minutes, and the screen sleeping during that is a hassle.
A laptop on the same home Wi-Fi as the handheld: Mac, Linux, or Windows with WSL.
The password you set when you first turned the handheld on. If you've forgotten it, you can reset it from the device itself.
A terminal app on your laptop. On Mac, search "Terminal" in Spotlight. On Windows, open WSL. On Linux, you know.
An hour, mostly hands-off after the build starts.
What you'll be doing
Five things, in order:
Open a connection from your laptop to your handheld so you can send commands. (This is called SSH. Standard, secure, built into every Mac, Linux, and modern Windows.)
Tell the handheld it's OK to run admin commands without asking for the password every time.
Build the custom snapshot with the desktop environment in it. The slow step.
Tell the handheld to use your custom snapshot the next time it reboots.
Add the Desktop Mode toggle button so flipping between gaming and desktop is one tap.
Most of the work in steps 3–5 happens inside a maintained script called gameos-unlock, by Luke Short (Playtron's VP of Linux Engineering). You're running his script, not writing your own.
Step 1: Open the connection (SSH)
On the handheld, go to Settings → Network. Note your IP address (something like 192.168.0.103). Then in Settings, find Remote operation (sometimes called "SSH server") and turn it on.
On your laptop, open a terminal:
$export GAMEOS_IP_ADDRESS=192.168.x.x
Replace 192.168.x.x with the actual IP from your handheld. This just saves typing later.
Now create a digital "key" your laptop will use to talk to the handheld:
$ssh-keygen
It'll ask you a few questions. Press Enter to accept the defaults.
One trap: if your laptop already has an SSH key (you'd know if you've ever connected to GitHub or AWS), this command will offer to overwrite it. Say no and pick a different filename. Overwriting the old key will break those other connections permanently.
Then copy the key to the handheld:
$ssh-copy-id playtron@$GAMEOS_IP_ADDRESS
It'll ask twice. First say yes, then enter the handheld's password (the one you set on first boot). After this, your laptop and handheld can talk without needing a password every time.
Step 2: Skip the password prompts
Connect to the handheld:
$ssh playtron@$GAMEOS_IP_ADDRESS
Your prompt should change to look like [playtron@playtronos ~]$. That means you're sending commands to the handheld now, not your laptop. Run these:
The first one will ask for your handheld password (last time, hopefully). The exit puts you back on your laptop.
What this does: tells the handheld that future admin commands from you don't need a password. The build steps below would otherwise hang forever waiting for one.
This downloads the unlock recipe (the Containerfile is essentially a list along the lines of "install KDE, install these tools, set this up like so") and copies the templates so you can run them.
The default recipe installs KDE Plasma, which is the right choice for a small touchscreen device. Steam Deck uses the same one.
Step 4: Build the custom snapshot
This is the slow step. Make sure the handheld is plugged in.
Run this whole block. It looks like a lot, but you're just copy-pasting:
What's happening: your laptop is telling the handheld to download KDE, browsers, libraries and bake them into a new snapshot. Then it tells the handheld to use that snapshot and reboot.
Expect 25 to 40 minutes for the first run. Most of it is download time. You can walk away.
The terminal will go quiet near the end and then disconnect. That's the handheld rebooting. Wait a few minutes. The screen will go through some startup, and then you'll see a real desktop.
Step 5: Fix touchscreen on first boot
When the handheld first boots into the new desktop, the touchscreen probably won't respond. Joystick and buttons will work fine. The screen just sits there.
Not broken hardware. It's a small initialization race in Playtron's input system that resolves itself with one command from your laptop:
To make this permanent so you don't have to do it every login, there's a one-shot autostart installer at scripts/install-fix-inputplumber.sh. Run it once and you're done forever.
Don't try to stop or disable the input service instead of restarting it. That kills all input: touch, joystick, buttons. The handheld will look frozen. Always restart, never stop. I learned this one the hard way.
Installing apps
Apps come from Flathub, the standard Linux app store. Luke's repo includes a wrapper that installs an app and adds a launcher tile to your GameOS home screen at the same time:
If the desktop won't boot at all: hold the power button for 10 seconds, then power back on. The handheld will automatically pick the previous (working) snapshot. SSH back in and run sudo bootc rollback to make it permanent.
The easy path
If the walkthrough above looked like too much, there's a friendlier way. I packaged the whole playbook as a skill for AI coding assistants: Claude, Cursor, Codex, Copilot, and dozens of others. You install it once. From there, you talk to your AI assistant in plain English, and it walks you through, flagging the gotchas as you hit them.
That single command works on a Mac or Linux laptop, or Windows with WSL. It uses skills.sh under the hood.
Then open your AI assistant and say something like:
"I just got a SuiPlay0x1 and I want to install Linux on it. Walk me through it."
"My SuiPlay0x1 touchscreen stopped working after the unlock."
"How do I install Steam on my Playtron handheld?"
The agent reads the playbook and gives you the exact commands to run, one at a time, with explanations. If you get an error, paste it back and the agent diagnoses it.
The agent doesn't run anything itself. It only tells you what to type. You stay in control of every command. That's deliberate: the failure modes here (a misconfigured device, lost SSH access) are the kind of thing where a human at the keyboard catches problems an automated agent would miss.
If you don't already use an AI coding assistant, Claude Code is the easiest one to start with for this.
References & credits
Source script and primary documentation
LukeShortCloud/gameos-unlock, Luke Short's unlock script. The Containerfile, desktop-mode installer, and Flatpak wrapper this article walks you through.